Midnight Mousse Attack
With my face and pyjamas spattered with melted chocolate, at 2 am I slumped down on the sofa exhausted. I'd never done anything like this before, not even in my exploratory youth. I rubbed at the slight ache in my body - a new feeling to me, but it was accompanied by a satisfied glow that can only come from one thing - a successful aquafaba experiment. That's right people, I made vegan chocolate mousse. By hand. At 1 am. Sober. Why? Well, what else do you do at when you're a night owl with oral fixation? Make food, obviously.
It was much easier than expected too. I don't own a mixer, so I used 2 hand whisks, one regular balloon whisk which I alternated use with a pump action rotary whisk, as I honestly couldn't decide which one was better. It took me about 15 minutes of solid whisk action until I was confident that I definitely had soft peaks, but in all fairness, it may have peaked a little earlier than that, but this being my first ever foray into mousse, I wanted to be sure.
I also used my own aquafaba from soaking and cooking dried chickpeas, so please bear in mind that this may make a difference to the stuff from the tin, as mine had no added salt and was really quite thick once I'd reduced it down. It's definitely preferable to the canned stuff, and not as tricky to do as it may seem. Think I'll stop buying canned beans once I've finished whatever I've got here. I also need the cupboard space for all of my new dehydrated experiments now.
Anyway, on with this super easy, super satisfying, light and fluffy, but rich chocolate mousse! I LOVE IT.
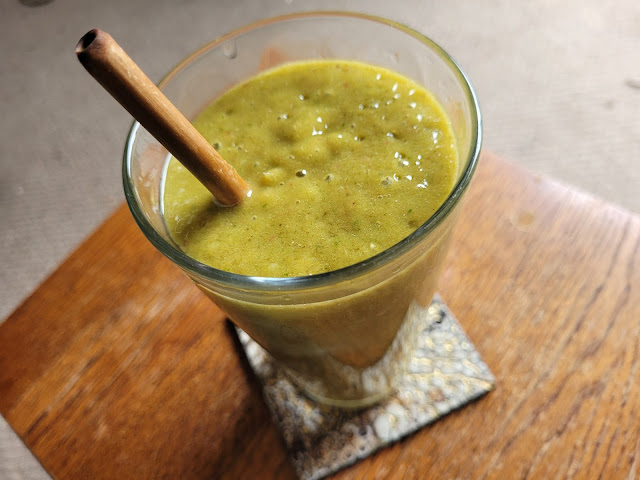
Oh, also this made 3 rather large wine glasses plus another almost half pint of mousse, so you could probably easily make 8 smaller, dessert sized ones which may be more dinner party appropriate.


It was much easier than expected too. I don't own a mixer, so I used 2 hand whisks, one regular balloon whisk which I alternated use with a pump action rotary whisk, as I honestly couldn't decide which one was better. It took me about 15 minutes of solid whisk action until I was confident that I definitely had soft peaks, but in all fairness, it may have peaked a little earlier than that, but this being my first ever foray into mousse, I wanted to be sure.
I also used my own aquafaba from soaking and cooking dried chickpeas, so please bear in mind that this may make a difference to the stuff from the tin, as mine had no added salt and was really quite thick once I'd reduced it down. It's definitely preferable to the canned stuff, and not as tricky to do as it may seem. Think I'll stop buying canned beans once I've finished whatever I've got here. I also need the cupboard space for all of my new dehydrated experiments now.
Anyway, on with this super easy, super satisfying, light and fluffy, but rich chocolate mousse! I LOVE IT.
Oh, also this made 3 rather large wine glasses plus another almost half pint of mousse, so you could probably easily make 8 smaller, dessert sized ones which may be more dinner party appropriate.

Midnight Mousse
serves 4 - 8
1 cup of aquafaba
1 cup of vegan chocolate, I used dark Belgian drops
a squirt of coconut syrup (could also use stevia or maple syrup, but this is what I had to hand. I'd guess at 1-2 tablespoons)
1 tsp vanilla extract
- Gently melt your chocolate in a bain marie. I used a pyrex bowl over a saucepan with an inch some simmering water in. Stir the chocolate to make sure it melts evenly and doesn't burn. Once smooth and glossy, take off the heat and leave it alone.
- Start whisking your aquafaba. Once the liquid becomes thick and no longer watery, add in your sweetener of choice and continue to whisk until soft peaks form.
- Stir your vanilla into your chocolate, and add to your aquafaba mix.
- Fold your chocolate into your aquafaba. (Now, I know you're supposed to gently fold in your flavours with traditional mousse making so as not to knock the air out, but my chocolate had cooled a little too much and plonked straight through my whipped bean juice and got stuck to the edge of the bowl, so I had to do some slightly more aggressive incorporating than I'd have liked, and I honestly thought I'd fucked it up as it didn't look like it was mixing at all, but I stuck with it and even did the unthinkable - I gave a few more quick pumps at the end with the whisk to make sure the chocolate fully mixed. Now, here, everything suddenly looked a lot more liquid and less frothy than it previously did and I panicked a bit. I do not recommend this, even though it did miraculously work out for me, I imagine that could be down to my over zealous whisking from earlier. Anyway, I popped it in the fridge, crossed my fingers and went to bed. Just thought you should know how it really went down, so you can learn from my bumbling).
- Pour into glasses, ramekins, or whatever dishes you want to serve them in and pop in the fridge.
- After letting set for many hours, remove from fridge and scoff the lot!
- Marvel at your masterful mousse making!
- Want to immediately make more aquafaba just so you can have more mousse.


Comments
Post a Comment